Some things remain the same with an optic-equipped pistol; some things change. One of the changes happens in your presentation. The change happens because, unlike with traditional iron sights, we no longer have the luxury of our peripheral version correcting the pistol’s alignment, orientation as it comes up.
Let me walk you through the start of the presentation and the changes to it.
Count #1 – Grip. Nothing changes with how we have taught it. A good grip, high on the backstrap, with your trigger finger outside of the holster, indexed for the frame/slide interface. You have released any retention devices, such as a thumb break or lever. Your lower three fingers are around the front strap and applying rearward pressure; your palm, below the thumb, is applying forward pressure.
Count #2 – Clear. You raise the handgun up and out of the holster.
Count #3 – Rotate. Once the muzzle has cleared the top of the holster, you rotate the forward toward the threat, the target. You can lock the pistol here should you need to work from a retention position. Also, as the muzzle rotated on the threat, I de-activated the thumb safety on my M&P.
Count #4 – Smack. This count is where your hands meet and establish a two-handed grip on your pistol. It happens around your sternum, where your hands come together when you clap. The support hand, as it joins the grip, applies side-to-side pressure. Since my sights are the threat (target) and I’ve made the decision to fire, my finger is on the trigger.
Now the variation to your presentation starts. We talk about and demonstrate all three in the 250 and 350 Red Dot classes; however, I’m only covering one in this column for space considerations.
When my hands meet up, instead of immediately extending the pistol, I raise it. The handgun is close to my chest, and my elbows are still bent. Once the optic is even with my upper lip (mustache), I begin extending it towards the threat (target). By raising it like this, I get the optic into my eye line sooner.
While looking at where I want the round to impact, I extend the pistol and let the dot appear over that desired point of impact. My focus is still on the threat (target) rather than on the dot itself.
If the dot is not visible, one fix is is to apply downward and rearward pressure on the front strap with your pinkies.
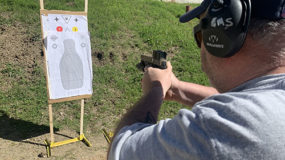
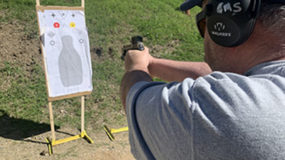
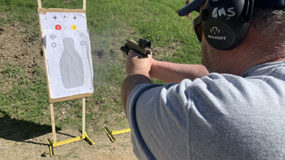
Like anything else, I had to work to get this presentation down, to engrain the procedure through myelination.
Your post-engagement procedures will not change.
As always, if you have questions, ask away. We are doing at least three dedicated pistol-mounted optics classes this year. The open enrollment 250RDS and 350RDS classes are in July and August, respectively. There is a closed enrollment RDS class this spring.
(Photo credit goes to John Johnson at the recent Rangemaster Tactical Conference.)

